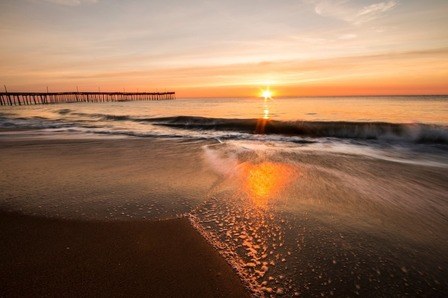
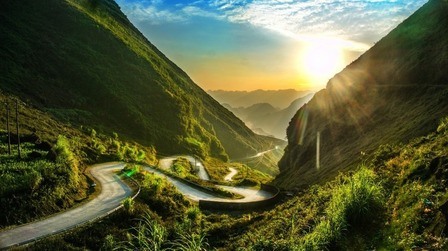
In this article, we are going to share everything you need to know to take better sunrise and sunset photos.
It includes how to adjust your camera settings, such as focal length, shooting mode, aperture, etc., along with some extra tricks that we really find effective during sunrise/sunset photography. Now, read on!
Camera Settings to Take Better Sunrise and Sunset Photos
Exposure Compensation
Most cameras have a tendency to crank up the exposure when they are used for shooting sunrise or sunset photos. Be alert and keep one step ahead of it by reviewing each photo right after you take it.

Use exposure compensation if the picture on the camera screen looks brighter than what is in real life.
ISO Setting

For the available ambient light, set ISO at the lowest possible to avoid noise images.
If the sky is cloudy, increase the ISO setting but don’t exceed 800 (for cameras built with a full-frame sensor) or 400 (for not full-frame cameras).
Or, you can mount your camera on a tripod.
Aperture
For Sunrise Photos

Recommended F-stop value: f/11+
Recommended shutter speed: 1/50 of a second (or the smallest setting available on your camera), or 1/15 of a second (for steady hands), or 1/30 of a second (for a lens with image stabilization)
For Sunset Photos
Recommended F-stop value: f/16+
Recommended shutter speed: 1/30 of a second (for cameras with image stabilization)
Extra tips:
- When there are too many shadow areas or when the camera has a full-frame sensor, avoid increasing the ISO setting above 400 or 800
- Increase the ISO setting when the shutter speed dips too low and the aperture is set at the largest recommended.
Shooting Mode

To control the depth of field, choose Aperture Priority mode when taking sunrise or sunset photos.
Focal Length

Select a wide-angle focal length from 24mm to 35mm. This setting allows you to capture all the clouds in the sky and the beauty of the landscape. A minor drawback is the sun in your photos will be small.
Optional Devices
A reverse graduated neutral density filter – which helps balance the shadows with the bright light of the sun and your digital camera becomes more manageable by making the horizontal darker

A tripod – which helps you take sharper photos

Extra Tips to Take Better Sunrise and Sunset Photos
How To Focus Your Camera Better In The Darkness?
Use An Open Aperture

Follow our guide as above when your camera struggles in focusing. The higher the f-stop value, the greater the depth of field and the smaller the aperture you will get.
You can combine this neat trick with the torch method as below.
Use A Torch
Bring extra light, a torch, a headlamp, or a flashlight – anything you have at hand.

Some people even cast a fireball. In our opinion, a headlamp is the better choice if you have to hike in rough terrain or a mountain because it keeps your hands free.
A flashlight is better for photographing because it’s more powerful and usually has different bright options. The light beam of some flashlights is adjustable as well.
Turn on a flashlight and focus the light on an object at least 10 feet away. Now, switch the focus of your camera to manual and take photos.
Use A Star
This trick is commonly used for astrophotography but we find that it also works in sunrise and sunset photographs. Here is how to do:
- Change to the Live View setting
- Turn on Manual Focus
- Zoom into a star
- Gradually rotate the camera focus ring
Timing
Arrive Early!

Try to arrive at least 60 minutes before sunrise or sunset so that you’ll have extra time for preparation. Things like setting up your cameras and camera accessories, practicing focusing, or wandering around to find the best spots will take much more time than you might think.
Shoot During Golden Hour!

Golden hour is an interval right after the sun rises or sets over the horizon, which averagely lasts for 60 minutes.
This period of time is usually shorter during the summer months and longer during the winter.
Stay Longer
Lots of photographers leave immediately when the sun is covered by some clouds or after the sunset or sunrise. But please stay a bit longer if you’re not in a hurry!
Clouds will fly away and as mentioned above, you’ve got 40-60 minutes to take sunrise/sunset photos. Be patient! Not saying that you might get a precious opportunity to watch Crepuscular rays beaming, which helps make greater photos.
Use The Reflections
A good way to double the beauty of sunrise/sunset photos is by including inflections. A popular method is photographing the reflection of a still pond, rock pool, and puddle.

Or, go to the rocky area after the rain and photograph puddles held in the rock platforms.
Some photographers even venture to the beach during the low tide. A trick to smooth out tiny ripples is to use long exposure.
Conclusion
Aside from the tips we’ve just mentioned above, you should also search the internet for the location and scout it to find more potential best spots. Pay attention to the weather as well. Besides, be flexible! Switch the direction or the position to find where the sky is the most beautiful.
That’s all for our article “How to take better sunrise and sunset photos”. Thanks for reading!


